
Adding tags to Google Tag Manager
Here's a quick guide to help you add tags to your Google Tag Manager account. Once these are set up and published, they will automatically fire on your website (as long as you have sent us your GTM code).
- Add a new tag
- Log in to your GTM account and on the dashboard click to add a new tag:
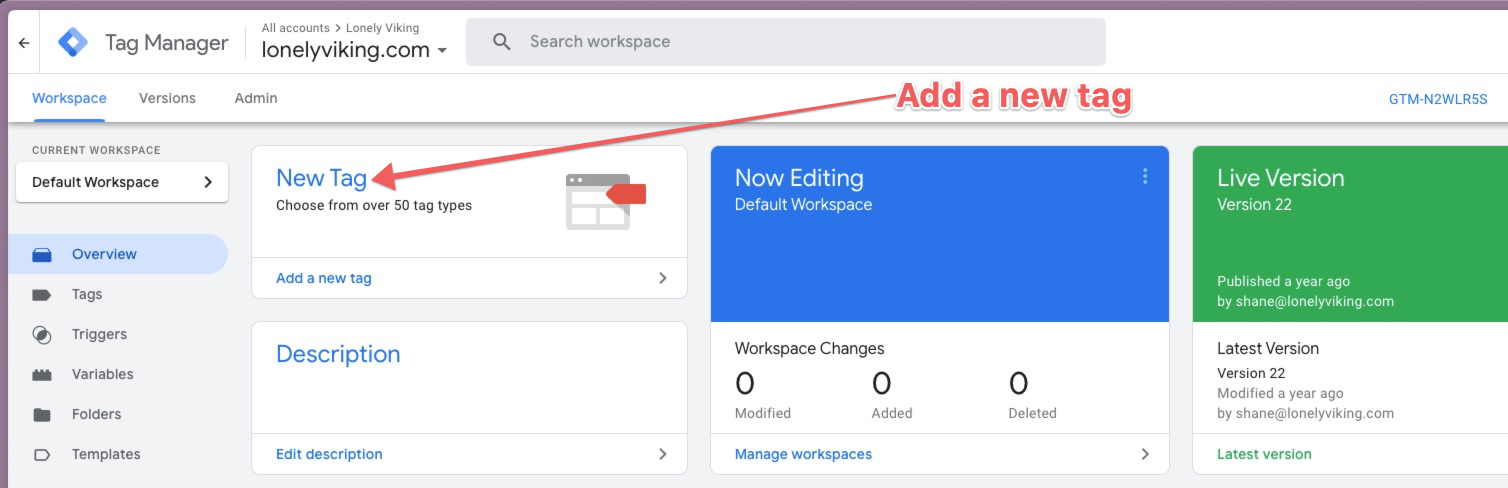
- Log in to your GTM account and on the dashboard click to add a new tag:
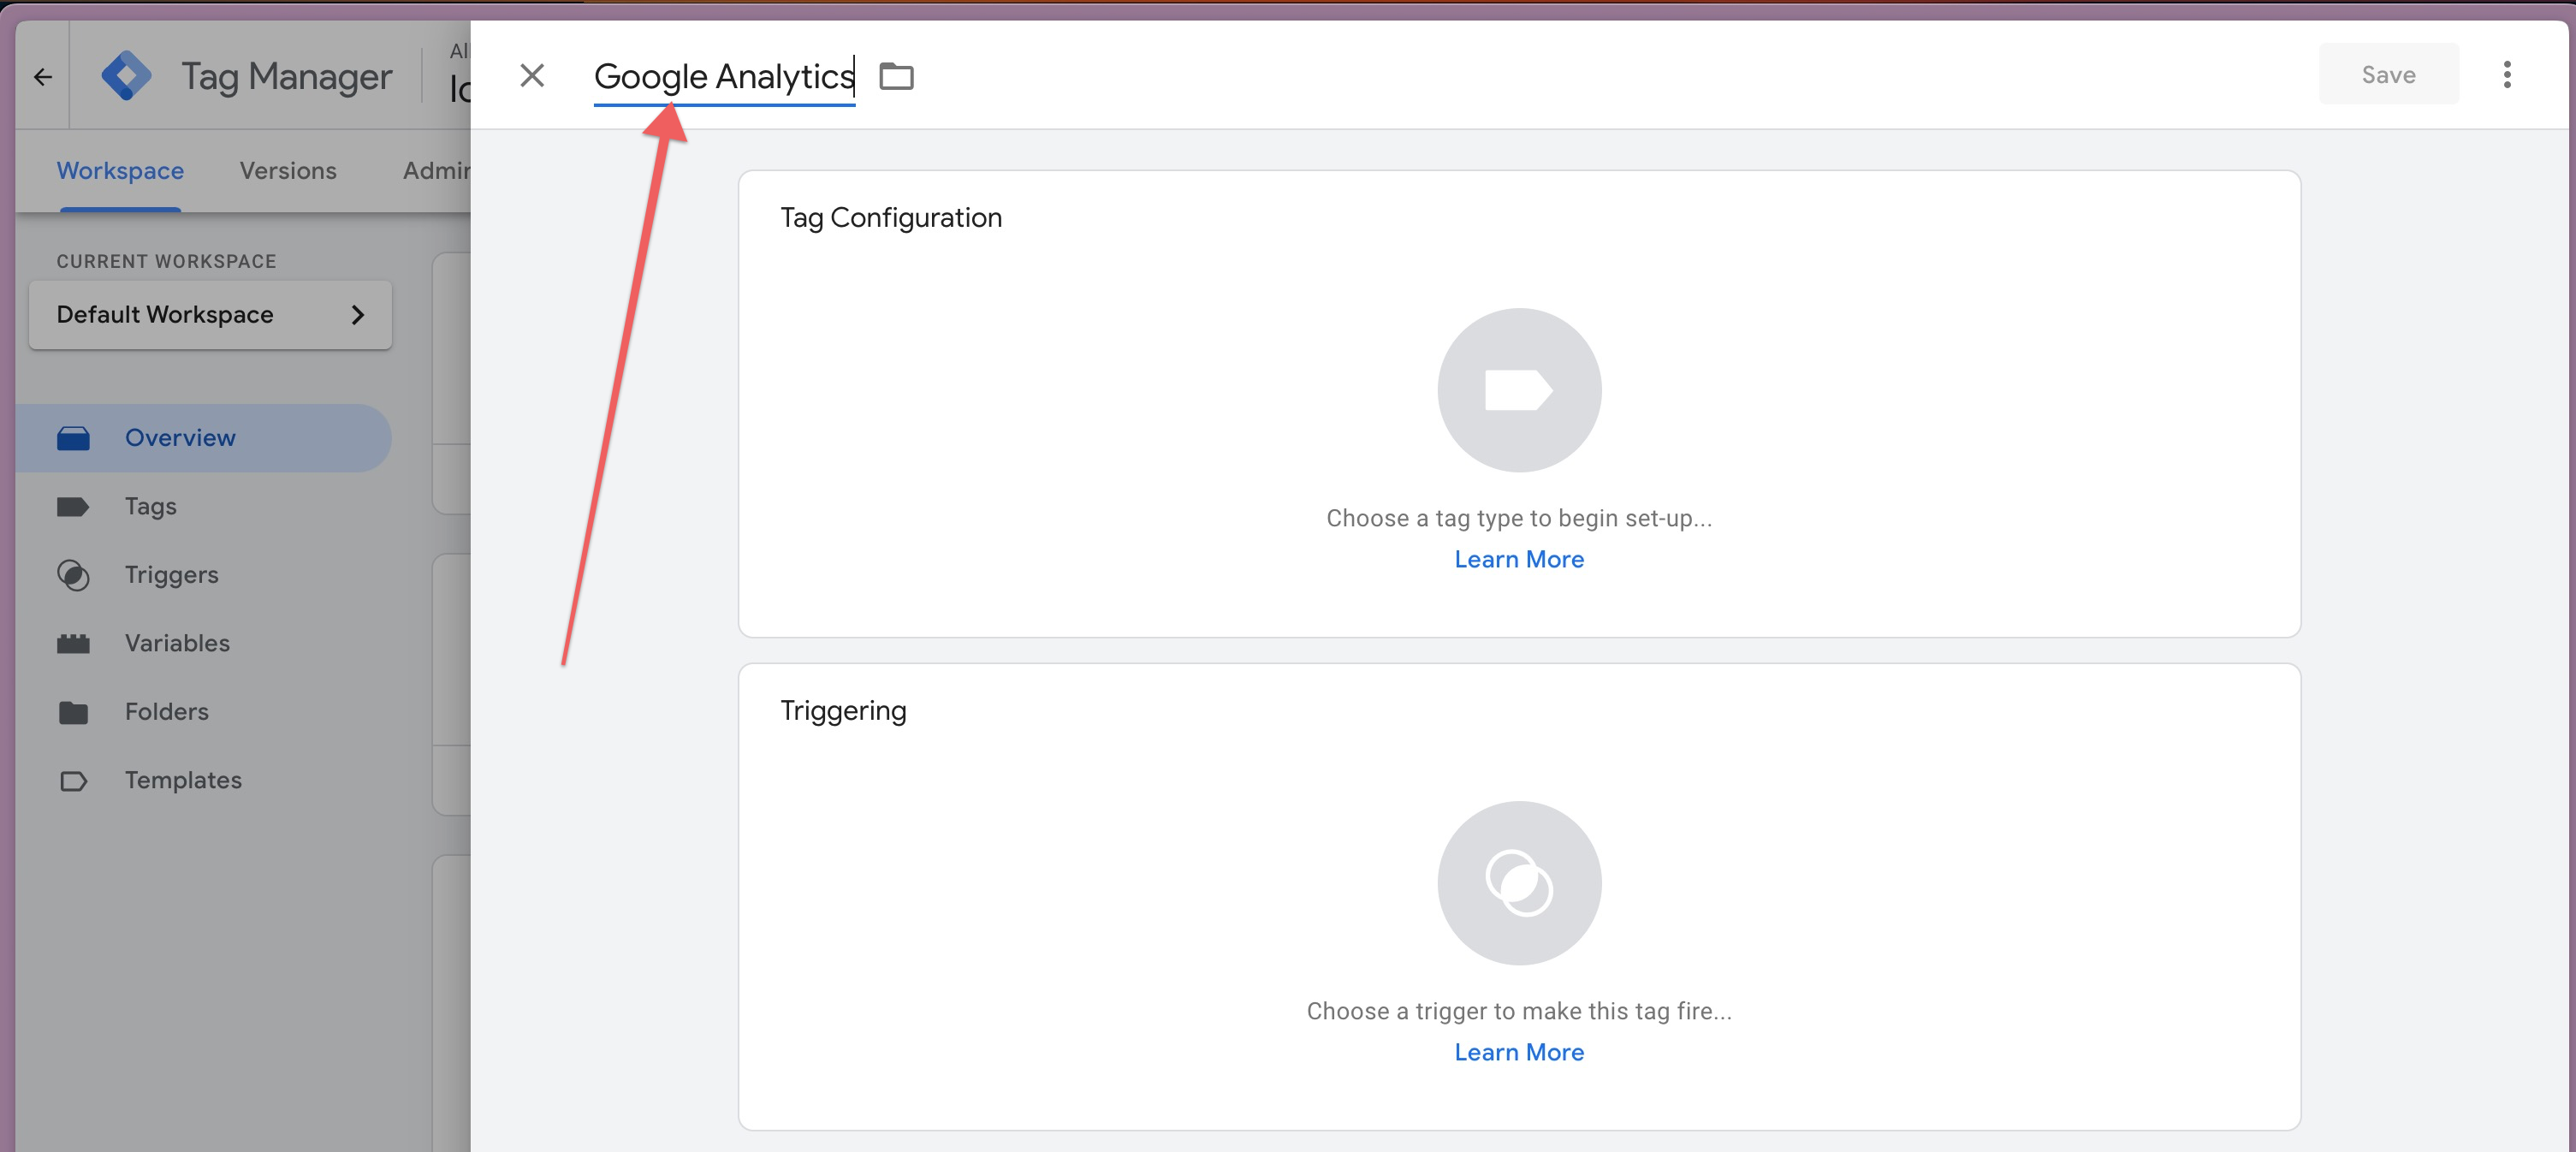
- Set up your new tag
- Name your tag appropriately

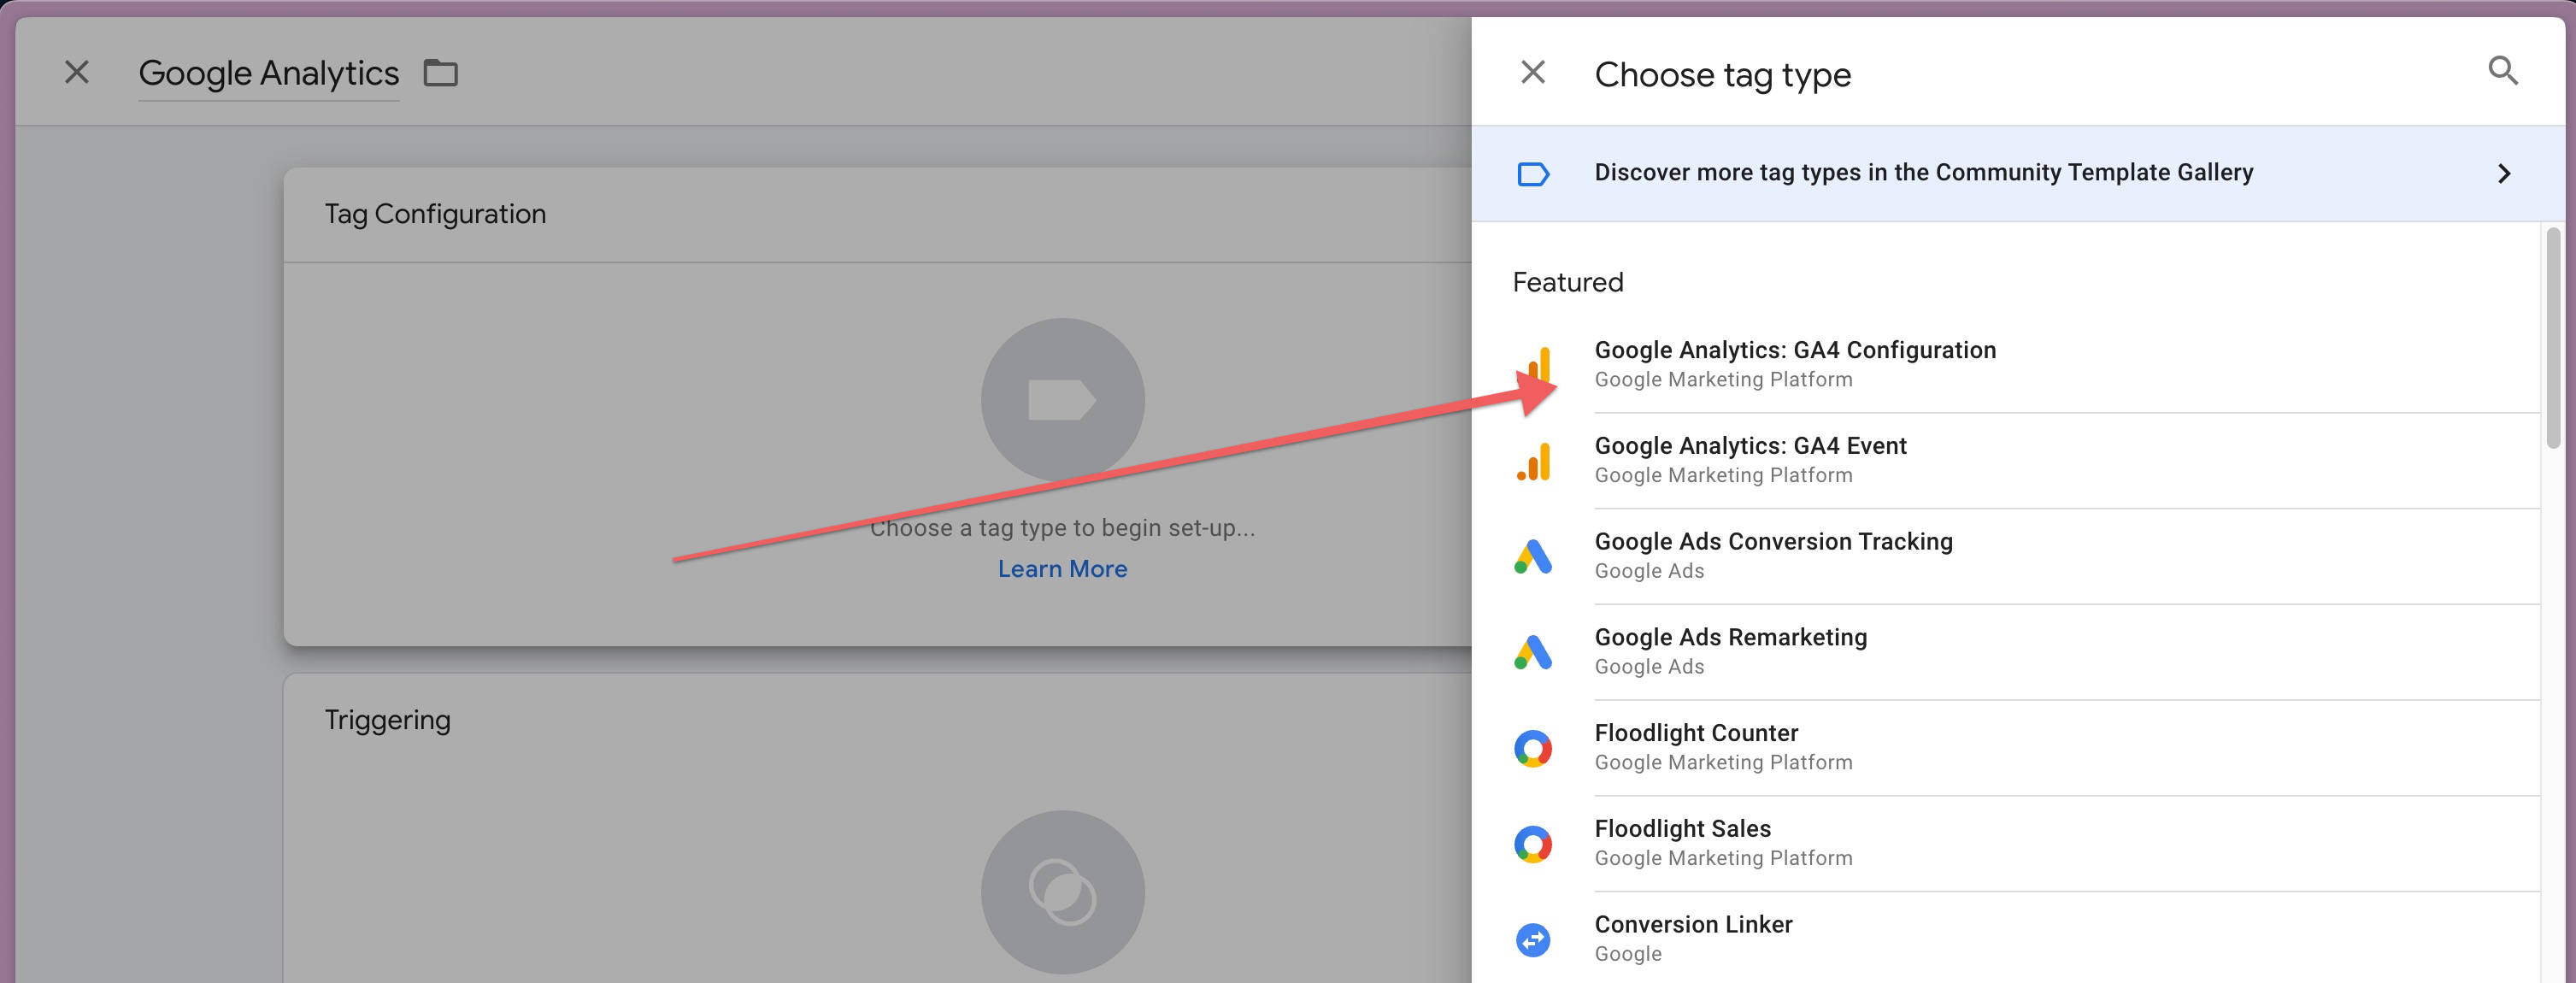
- Click on the 'TabConfiguration' block and select your tag type to set it up
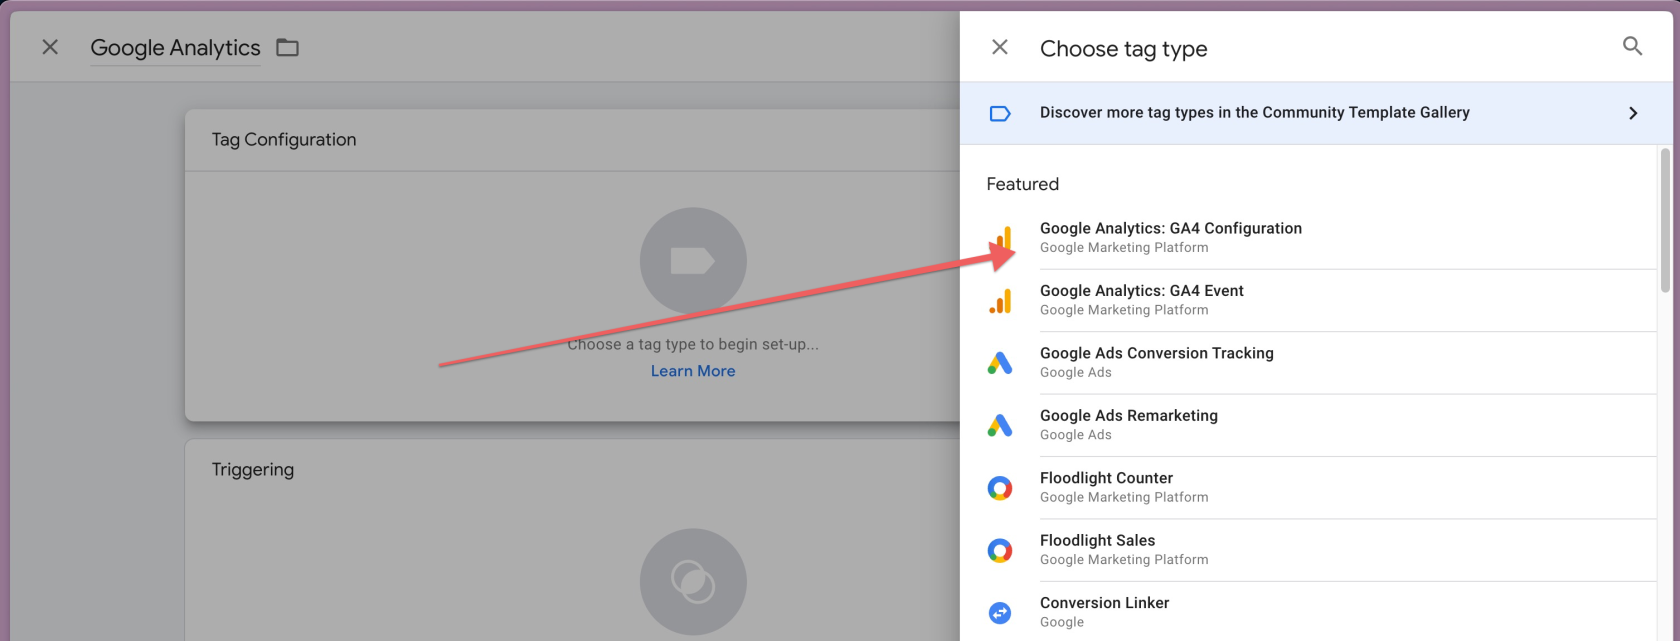
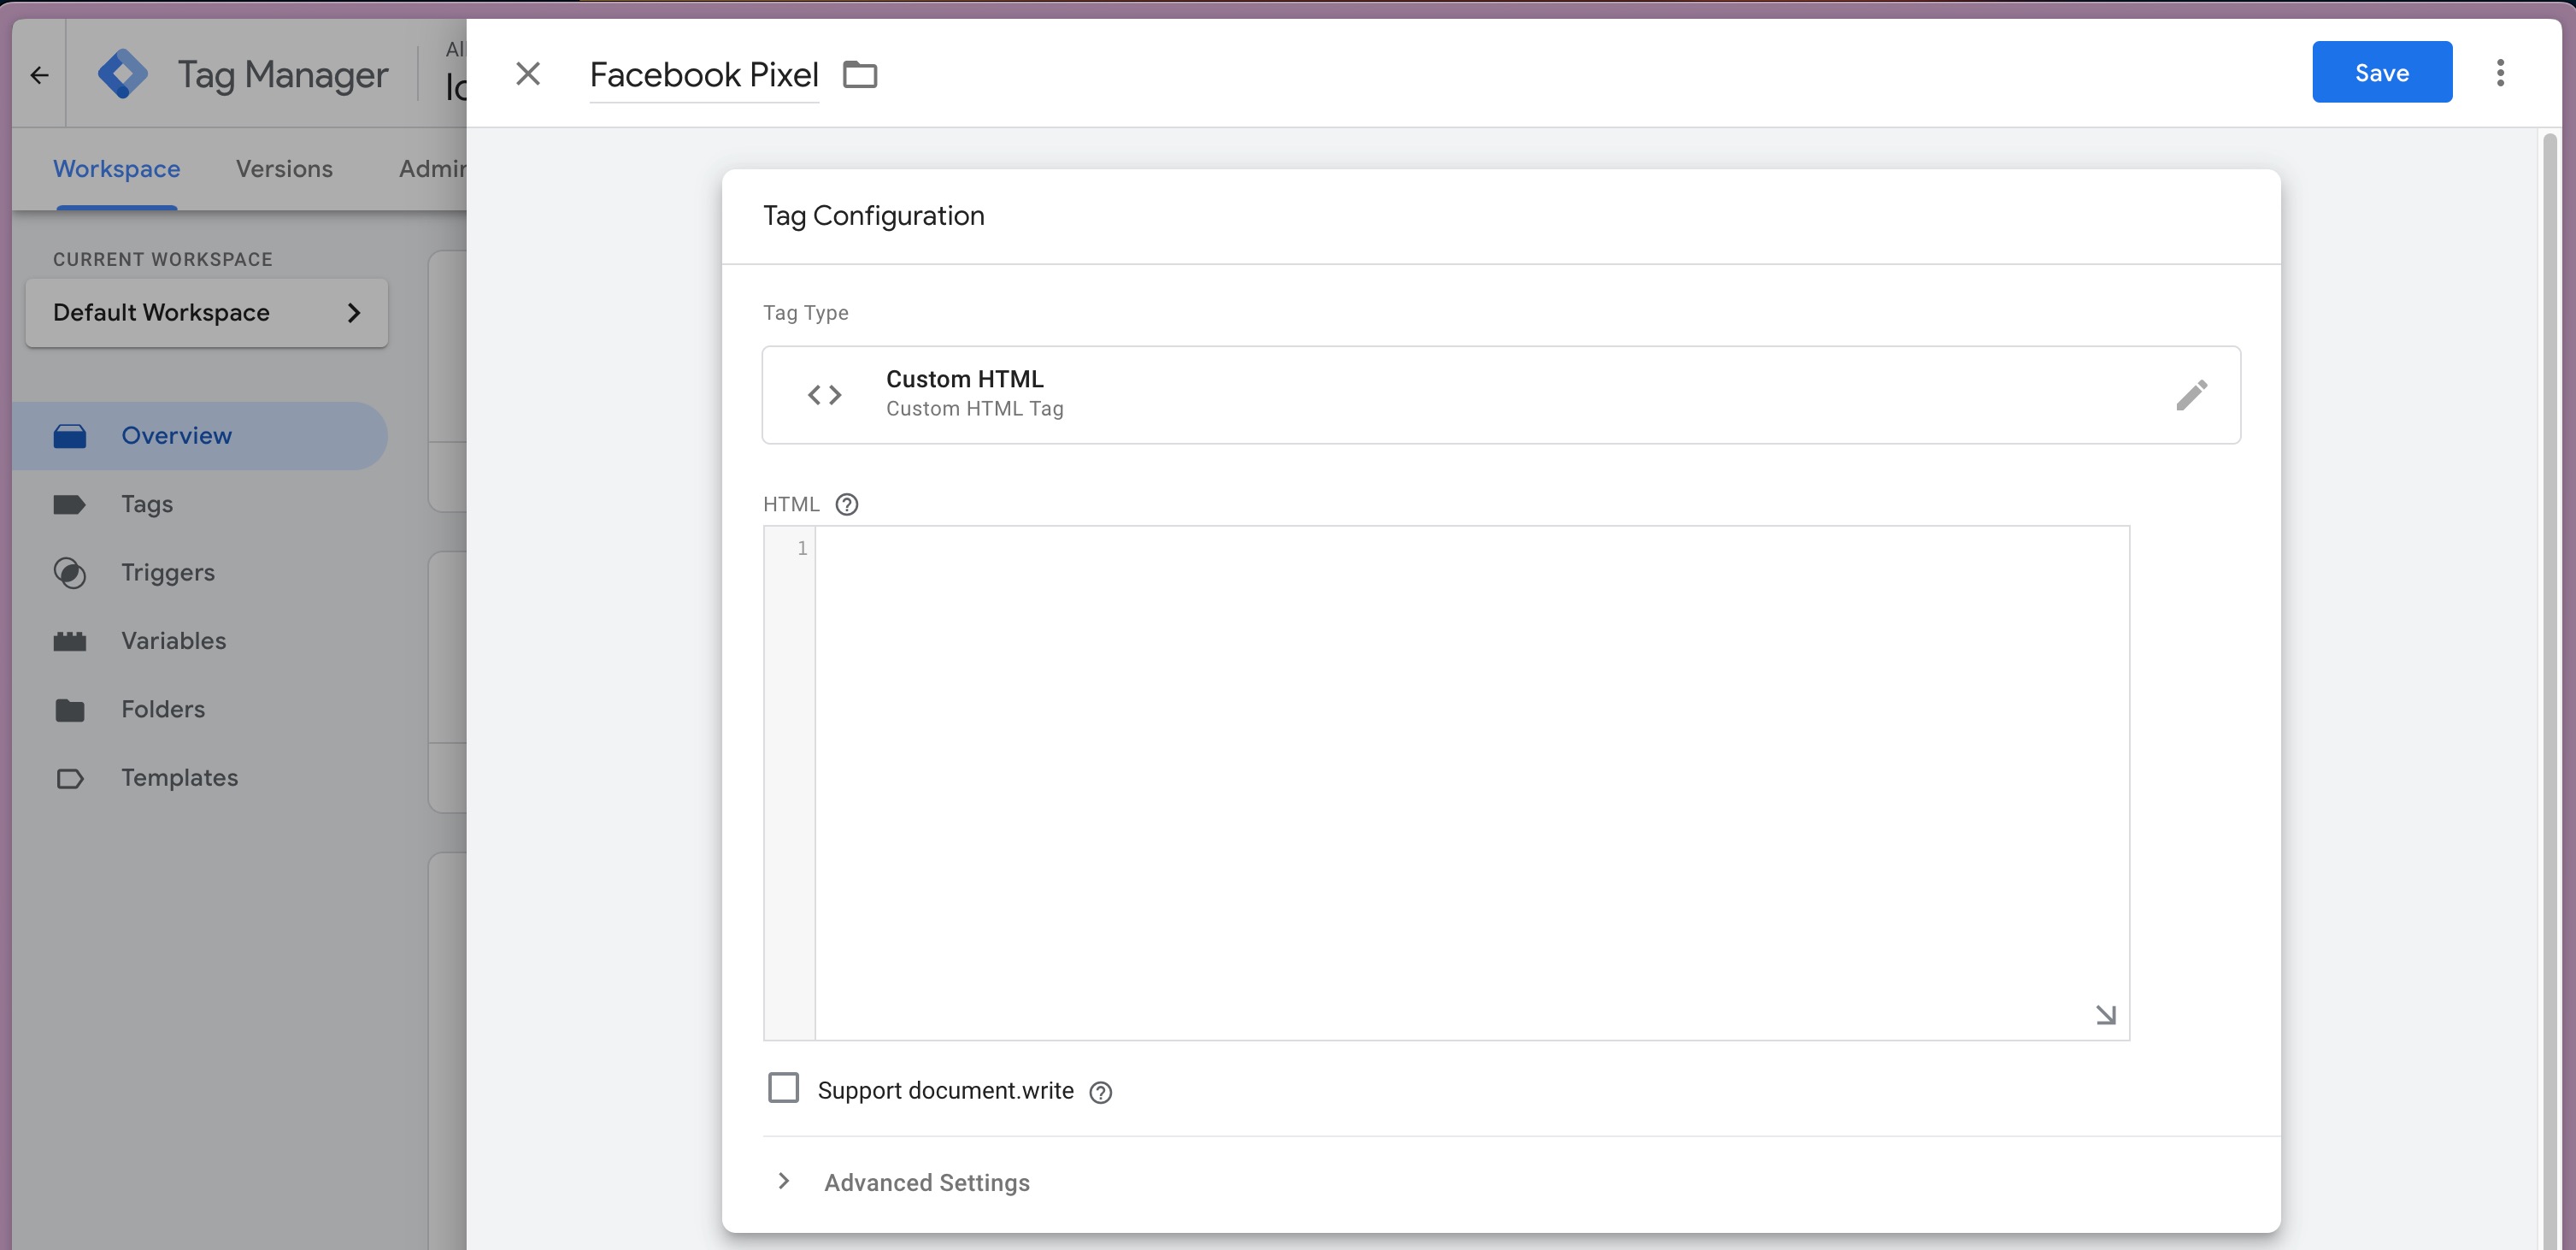
- For any tags that aren't available via a preset (like Facebook Pixel), select the 'Custom HTML' option

- Once selected fill in the appropriate and required details
- Name your tag appropriately
- Set up the Tag Triggering
- Click on the 'Triggering' block
- For most purposes the 'All Pages' option will suffice so go ahead an select that
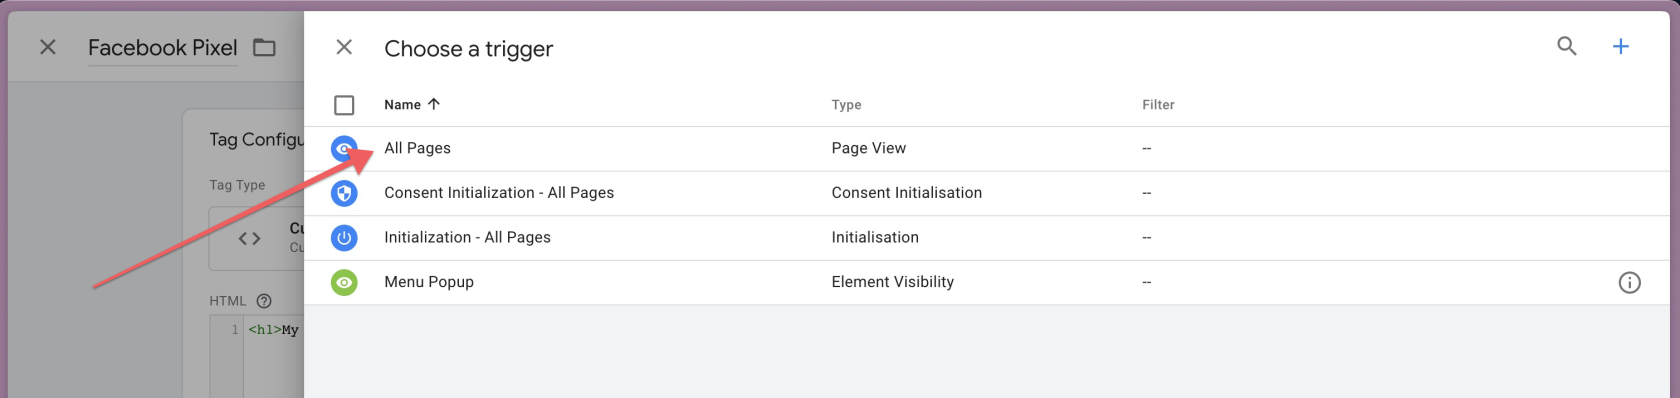
- When you're done save your tag using the blue save button at the top right
- Submit and publish
- Once you have added all of your desired tags, click the blue 'Submit' button at the top right
- Give your submission a version name and description and click the blue 'Publish' button at the top right
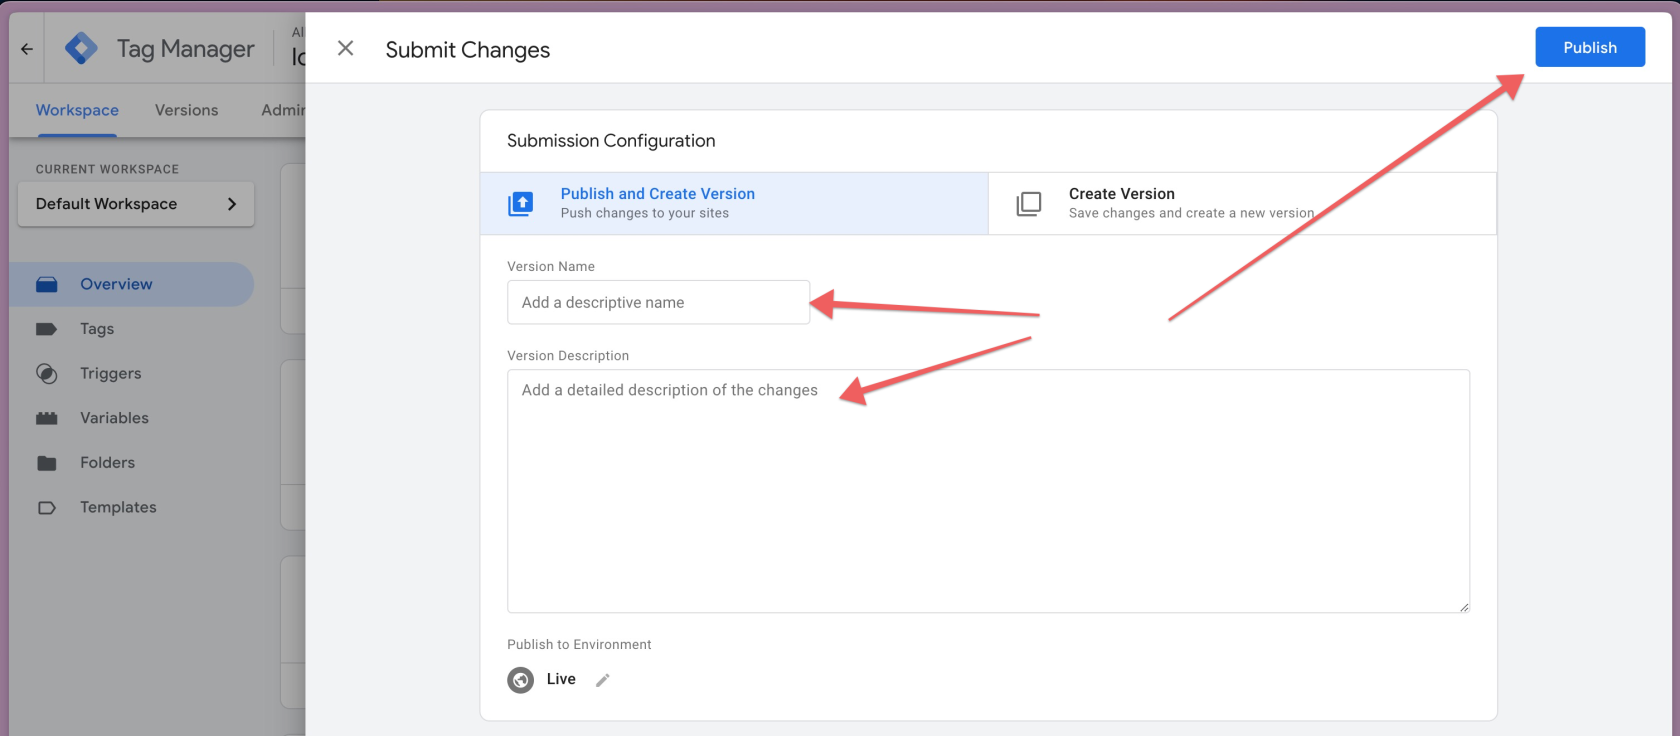
- That's it! Your tags will now fire on your website.


No Comments